Sony HT-G700 Firmware Upgrade Tutorial
This article describes how make soundbar – Sony HT-G700 firmware upgrade. So grab a drink and USB drive and continue reading if you want to learn how to do it.
If you prefer to watch a video version of this tutorial, go ahead and click on the YouTube video below.
Checking Firmware version
First of all, we have to check what version the soundbar does have.
- Please turn on the soundbar and make sure that it’s connected to the Subwoofer (there should be a green light on the Subwoofer).
Note: A different software version is displayed depending on whether Subwoofer is connected or not. - Press in order [MENU], down arrow, then select “SYSTEM” and press the [ENTER] button on the remote control.
- Press down arrow continuously to select “VERSION” and press the [ENTER] button on the remote control.
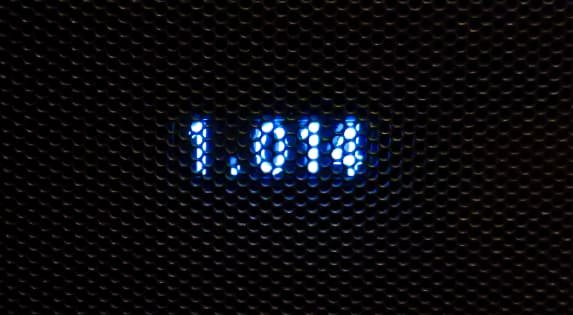
- Here you will find the Sound Bar firmware version information.
- Please write it down and go back to your PC.
Finding the correct HT-G700 firmware
For some reason, each Sony region has a different firmware version number. I contacted Sony support, and I quote: “That the software version will depend on the region you are located/purchased the soundbar.”

That means that it is best to download from your local Sony website to make an HT-G700 Firmware upgrade. So type Sony (your country name) in the Google Search to find the local site. For example: Sony UK, Sony Lithuania, Sony Germany etc.
Downloading firmware
Next, go to your selected Sony page to find the firmware ( I will be using the Sony US website as an example because it’s in English, but I have downloaded my firmware from Lithuanian website).
Find the Sony HT-G700 page, click Support, and the Downloads. You will find the latest firmware.

Now it’s time to use the notes you took previously. Compare them if you still need to upgrade; let’s continue.
Click on its firmware link. On the new page, you will see the Download button. Save the firmware file on the folder you will find 😀 later.
If you are download with chrome you might get a security warning.
Preparing the flash drive
Next, you will need a USB drive formatted to FAT 32. I will show you how to do it. Formatting will delete all the files, so make sure you don’t have anything important there.
- Open File Explorer and find your USB drive, right-click and select Format.
- Before formatting, compare the size of the disk to make sure you have the correct USB.
- In the new window, select File System as FAT32.
- Make sure Quick Format is checked and click Start.
Now let’s find the firmware file. It will be a ZIP archive, so extract it.
Inside you will find an FW_SB1.BIN. Copy or Move that file to your USB drive. And you are ready to upgrade firmware.
Updating the firmware
- Power on the Sound Bar as usual; make sure the Subwoofer is connected. Refer to the manual if it’s not.
- Insert the USB drive with the new firmware into the back of the Sound Bar.
- Press the MENU button and then the down arrow on the remote control until you hit “UPDATE” and select it by pressing the ENTER button.
- Next, START will appear. By pressing the ENTER button, the update process will begin. And the 0% will appear on display.
- Important: do not turn the device and leave it to finish the process.
- It will take from 5-10 minutes to complete. And then, “DONE” will be displayed, the Sound Bar will restart automatically.
- Be sure to check that the firmware version was updated to the latest version by referring to previous steps.


